In this article:
- Overview
- Audience
- Prerequisites
- Find a Google Cloud instance
- Register the instance
- Execute the Agent Installation Script manually
- Contacting Cloud Application Manager Support
Overview
This tutorial will show you how to import an existing instance that was discovered in your Google Cloud provider using Cloud Application Manager.
For further information about instance registering using Cloud Application Manager, please visit Register an Existing Instance.
Audience
Users who want to register their Google Cloud instances into Cloud Application Manager to enable lifecycle management on them.
Prerequisites
- A Google Cloud machine
- An active Cloud Application Manager account
- An existing Google Cloud account with active instances
Find a Google Cloud instance
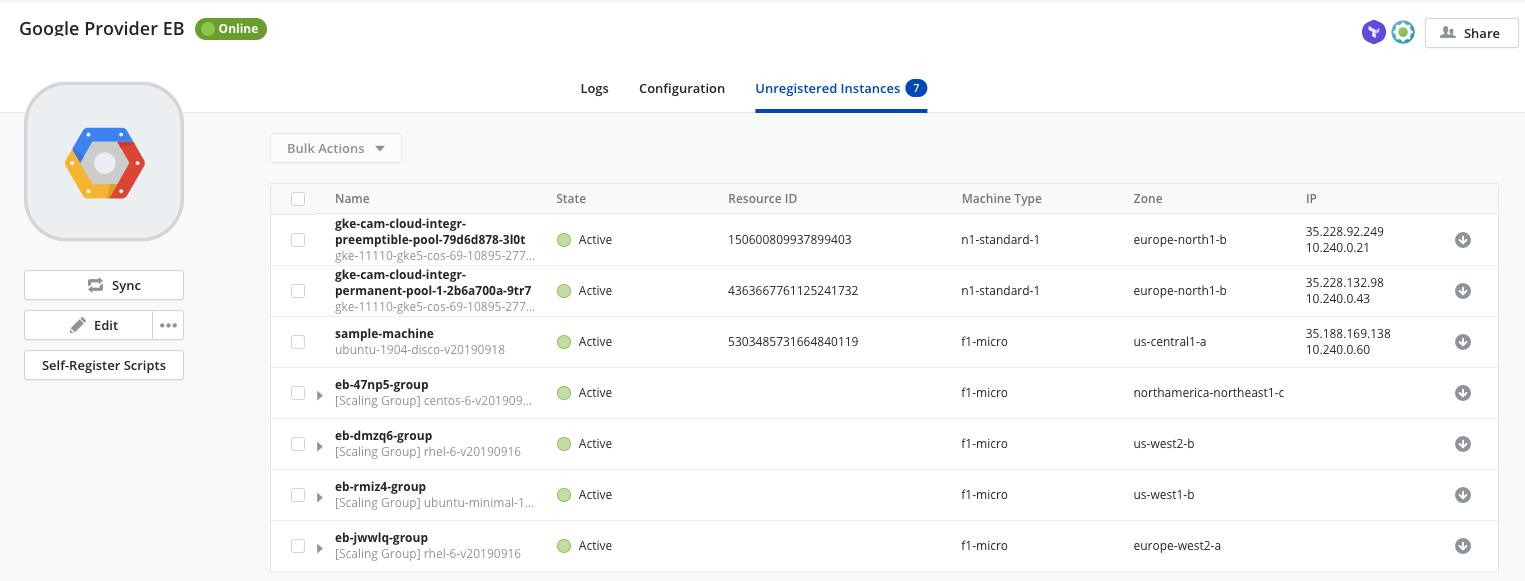
Within the Cloud Application Manager workspace, navigate to your Google Cloud provider and run the sync function by clicking Sync.
The sync process will discover unregistered Google Cloud instances and list them under the Unregistered Instances tab.

Register the instance
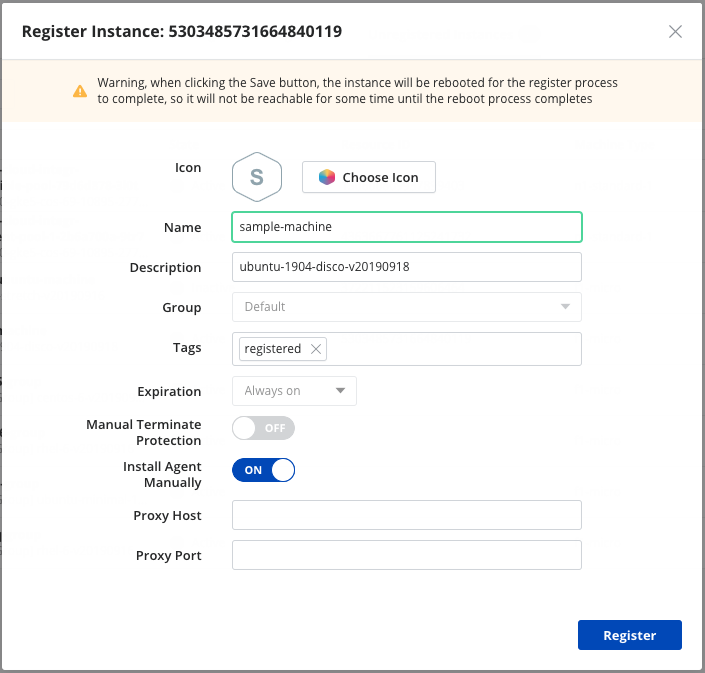
Under the Unregistered Instances tab or within the Instances page, click the instance you want to import and register.
Provide any details for the instance in the fields provided.

The automatic registration process will require reboot the virtual machines, or regenerated in case of an scaling group.
To avoid the restart operation, the Install Agent Manually toggle can be enabled to install manually the Cloud Application Manager (CAM) agent.
Click Register to register the instance.
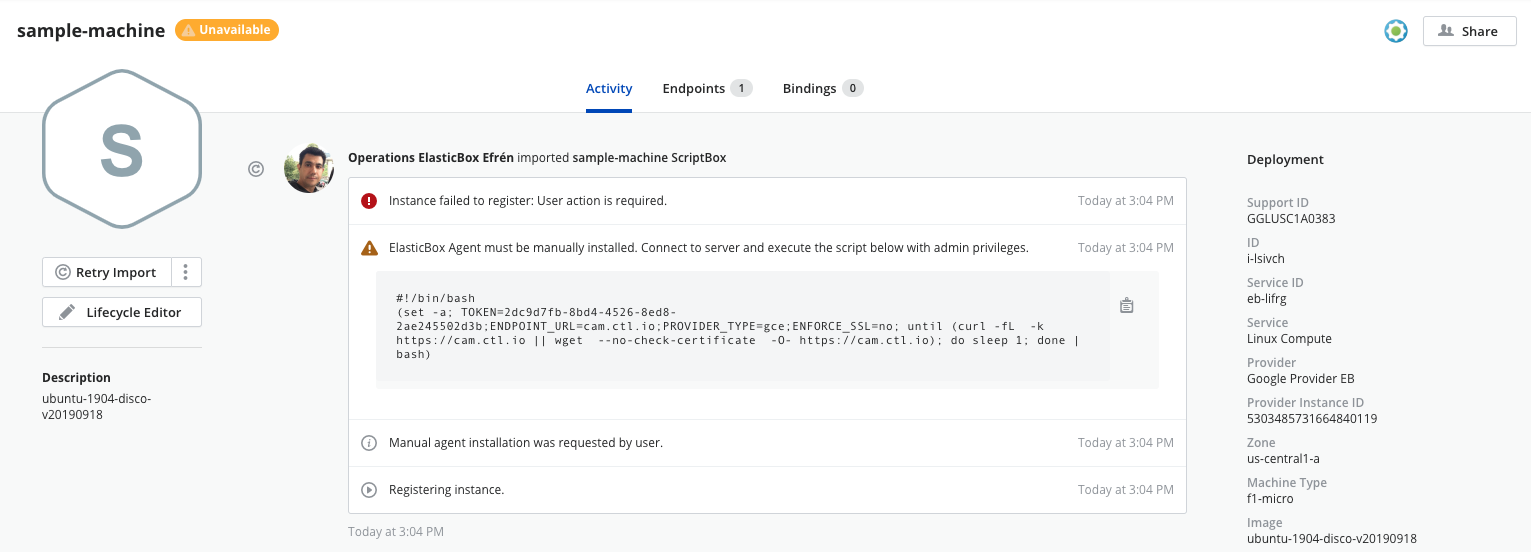
If Install Agent Manually toggle was enabled, then an error message is returned because the agent installation script that allows Cloud Application Manager to register the instance has not been executed on it yet. You can then proceed to the manual installation process described below to fix the issue.
Execute the Agent Installation Script manually
Copy the agent installation script provided under the Activity tab, in the log details section of the instance details page. This script is unique for each instance.

Log-in to the instance residing in your Google Cloud provider.
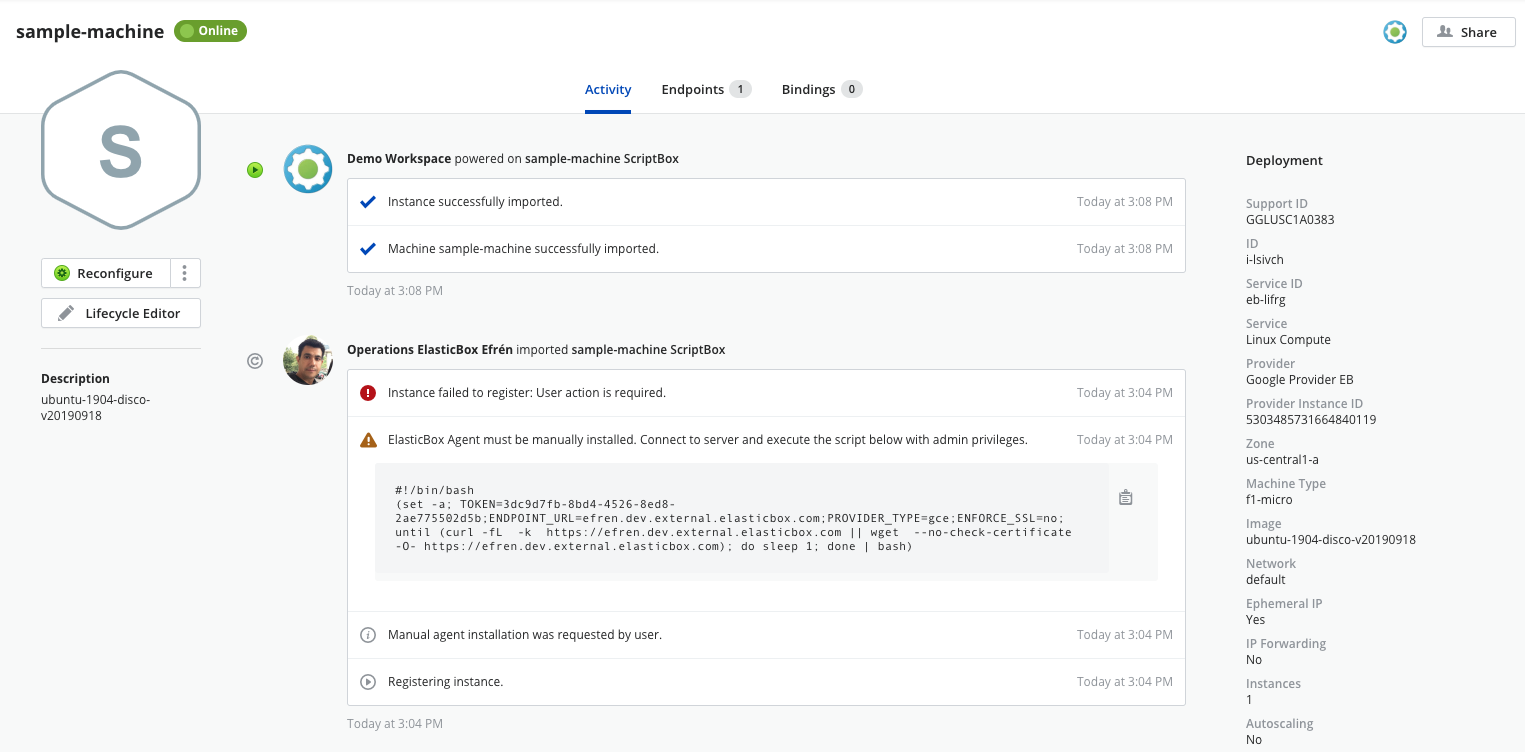
Execute the agent installation script.

Once the script is executed, the instance will be available in Cloud Application Manager as a registered instance.

Now you can use application lifecycle management features on this instance from within Cloud Application Manager.
Contacting Cloud Application Manager Support
We’re sorry you’re having an issue in Cloud Application Manager. Please review the troubleshooting tips, or contact Cloud Application Manager support with details and screenshots where possible.
For issues related to API calls, send the request body along with details related to the issue.
In the case of a box error, share the box in the workspace that your organization and Cloud Application Manager can access and attach the logs.
- Linux: SSH and locate the log at /var/log/elasticbox/elasticbox-agent.log
- Windows: RDP into the instance to locate the log at \ProgramData\ElasticBox\Logs\elasticbox-agent.log